Godot RL 智能体
Godot RL 智能体是一个开源软件包,为视频游戏开发者、人工智能研究人员和爱好者提供了学习其非玩家角色(NPC)或智能体的复杂行为的机会。
该库提供了以下功能:
- 在 Godot 引擎中创建的游戏与在 Python 中运行的机器学习算法之间的接口
- 对四个著名的强化学习框架进行包装:StableBaselines3、CleanRL、Sample Factory 和 Ray RLLib
- 支持基于内存的智能体,具有 LSTM 或注意力机制的接口
- 支持 2D 和 3D 游戏
- 一套 AI 传感器,增强智能体观察游戏世界的能力
- Godot 和 Godot RL 智能体完全免费,并采用非常宽松的 MIT 许可证开放源代码。没有任何附加条件,没有版税,没有其他限制。
你可以在他们的 GitHub 页面或他们的 AAAI-2022 研讨会论文上了解更多关于 Godot RL 智能体的信息。该库的创建者Ed Beeching是 Hugging Face 的研究员。
安装该库非常简单:pip install godot-rl
使用 Godot RL 智能体创建自定义 RL 环境
在本节中,你将学习如何在 Godot 游戏引擎中创建自定义环境,然后实现一个深度强化学习的 AI 控制器。
我们今天创建的示例游戏很简单,但展示了 Godot 引擎和 Godot RL 智能体库的许多功能。你随后可以深入研究更复杂的环境和行为示例。
我们今天要构建的环境称为 Ring Pong,它是乒乓球游戏,但球场是一个环形,球拍在环上移动。目标是让球在环内持续弹跳。

安装 Godot 游戏引擎
Godot 游戏引擎是一个用于创建视频游戏、工具和用户界面的开源工具。
Godot 引擎是一个功能齐全的跨平台游戏引擎,旨在通过统一的界面创建 2D 和 3D 游戏。它提供了一套全面的常用工具,使用户可以专注于制作游戏,而无需重新造轮子。游戏可以一键导出到多个平台,包括主要的桌面平台(Linux、macOS、Windows),以及移动(Android、iOS)和基于 Web 的(HTML5)平台。
虽然我们将指导你实现智能体的步骤,但你可能希望了解更多关于 Godot 游戏引擎的信息。他们的文档非常详尽,YouTube 上也有许多教程,我们推荐 GDQuest、KidsCanCode 和 Bramwell 作为信息来源。
要在 Godot 中创建游戏,你首先必须下载编辑器。Godot RL 智能体支持最新版本的Godot,即Godot 4.0。
可以在以下链接处下载:
加载初始项目
我们提供了两个版本的代码库:
要加载项目,在Godot项目管理器中点击导入,导航到文件所在位置,并加载 project.godot 文件。
如果按下 F5 或在编辑器中播放,你应该能够以人类模式玩游戏。游戏有多个实例运行,这是因为我们希望通过许多并行环境加快训练AI智能体的速度。
安装 Godot RL 智能体插件
可以从 Github 仓库或使用 Godot 编辑器中的 Godot Asset Lib 安装 Godot RL 智能体插件。
首先点击 AssetLib,然后搜索 “rl”。
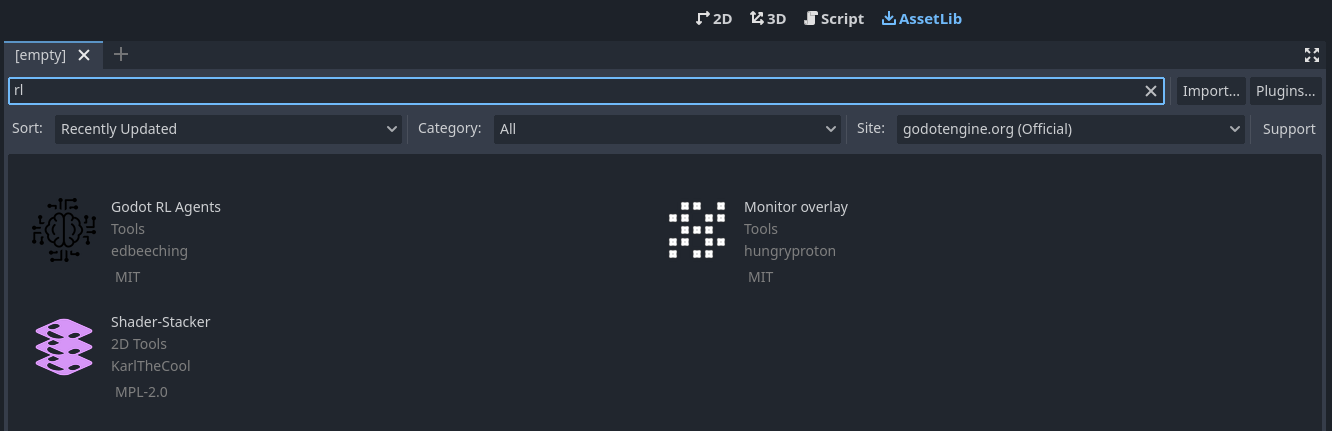
然后点开 Godot RL 智能体, 点击下载并筛除 LICENSE 和 README.md 文件,再安装。
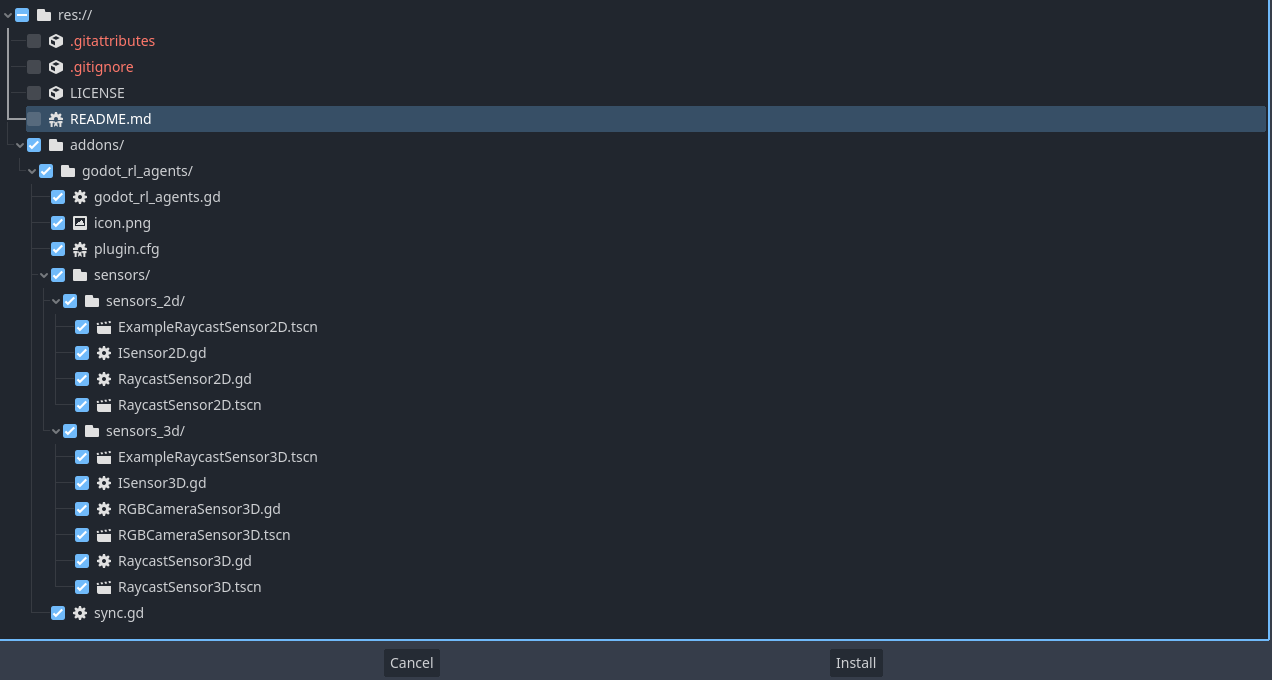
Godot RL 智能体插件现在已经下载到你的机器上了。再点击 Project → Project settings 确保添加:

加入 AI 控制器
现在我们想要在游戏中添加一个 AI 控制器。打开 player.tscn 场景,你会看到左侧有一个节点层级,类似于这样:
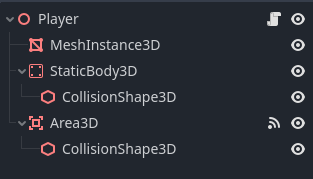
右键点击 Player 节点,然后点击 Add Child Node 。这里列出了许多节点,搜索 AIController3D 并创建它。
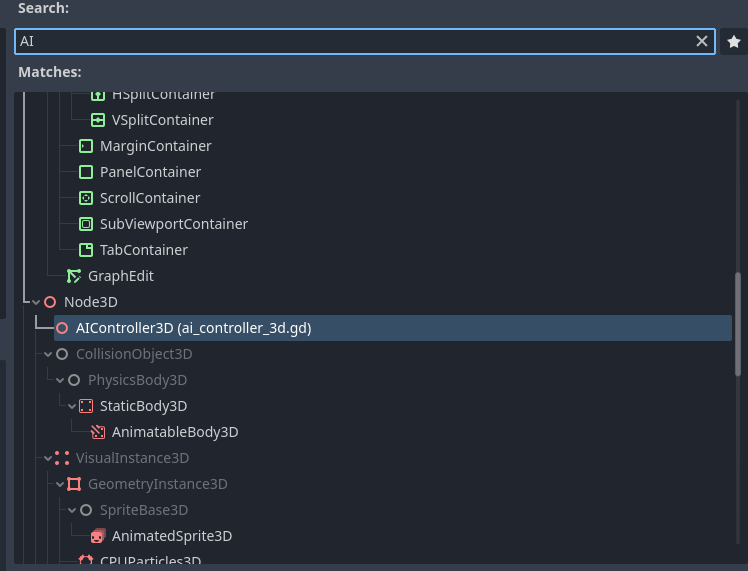
AI 控制器节点应该已经添加到场景树中,在其旁边有一个滚动条。点击它以打开附加到 AI 控制器的脚本。Godot 游戏引擎使用一种名为 GDScript 的脚本语言,它在语法上类似于 Python。该脚本包含需要实现的方法,以使我们的 AI 控制器正常工作。
#-- Methods that need implementing using the "extend script" option in Godot --#
func get_obs() -> Dictionary:
	assert(false, "the get_obs method is not implemented when extending from ai_controller")
	return {"obs":[]}

func get_reward() -> float:
	assert(false, "the get_reward method is not implemented when extending from ai_controller")
	return 0.0

func get_action_space() -> Dictionary:
	assert(false, "the get get_action_space method is not implemented when extending from ai_controller")
	return {
		"example_actions_continous" : {
			"size": 2,
			"action_type": "continuous"
		},
		"example_actions_discrete" : {
			"size": 2,
			"action_type": "discrete"
		},
		}

func set_action(action) -> void:
	assert(false, "the get set_action method is not implemented when extending from ai_controller")
# -----------------------------------------------------------------------------#
为了实现这些方法,我们需要创建一个继承自 AIController3D 的类。在 Godot 中,这很容易做到,被称为“扩展”一个类。
右键单击 AIController3D 节点,然后单击“扩展脚本”,将新脚本命名为 controller.gd。现在你应该有一个几乎为空的脚本文件,看起来像这样:
extends AIController3D

# Called when the node enters the scene tree for the first time.
func _ready():
	pass # Replace with function body.

# Called every frame. 'delta' is the elapsed time since the previous frame.
func _process(delta):
	pass
我们现在将实现这 4 个缺失的方法,请删除这段代码并用以下代码替换:
extends AIController3D

# Stores the action sampled for the agent's policy, running in python
var move_action : float = 0.0

func get_obs() -> Dictionary:
	# get the balls position and velocity in the paddle's frame of reference
	var ball_pos = to_local(_player.ball.global_position)
	var ball_vel = to_local(_player.ball.linear_velocity)
	var obs = [ball_pos.x, ball_pos.z, ball_vel.x/10.0, ball_vel.z/10.0]

	return {"obs":obs}

func get_reward() -> float:
	return reward

func get_action_space() -> Dictionary:
	return {
		"move_action" : {
			"size": 1,
			"action_type": "continuous"
		},
		}

func set_action(action) -> void:
	move_action = clamp(action["move_action"][0], -1.0, 1.0)
我们现在定义了智能体的观测,即球在其本地坐标空间中的位置和速度。我们还定义了智能体的动作空间,这是一个从 -1 到 +1 的单一连续值范围。
下一步是更新播放器的脚本,以使用 AIController 的动作。通过点击播放器节点旁边的滚动条,编辑播放器的脚本,将代码更新为以下内容:
extends Node3D

@export var rotation_speed = 3.0
@onready var ball = get_node("../Ball")
@onready var ai_controller = $AIController3D

func _ready():
	ai_controller.init(self)

func game_over():
	ai_controller.done = true
	ai_controller.needs_reset = true

func _physics_process(delta):
	if ai_controller.needs_reset:
		ai_controller.reset()
		ball.reset()
		return

	var movement : float
	if ai_controller.heuristic == "human":
		movement = Input.get_axis("rotate_anticlockwise", "rotate_clockwise")
	else:
		movement = ai_controller.move_action
	rotate_y(movement*delta*rotation_speed)

func _on_area_3d_body_entered(body):
	ai_controller.reward += 1.0
现在我们需要在 Godot 中运行的游戏和 Python 中正在训练的神经网络之间进行同步。Godot RL Agents 提供了一个节点来完成这个任务。打开 train.tscn 场景,在根节点上右键单击,然后选择“添加子节点”。然后,在搜索框中搜索 “sync”,添加一个 Godot RL Agents Sync 节点。这个节点负责在 TCP 上处理 Python 和 Godot 之间的通信。
您可以在编辑器中实时运行训练,首先使用 gdrl 启动 Python 训练。
在这个简单的示例中,合理的策略可以在几分钟内学到。你可能希望加快训练速度,点击训练场景中的 Sync 节点,你会看到编辑器中暴露了一个名为 "Speed Up" 的属性:
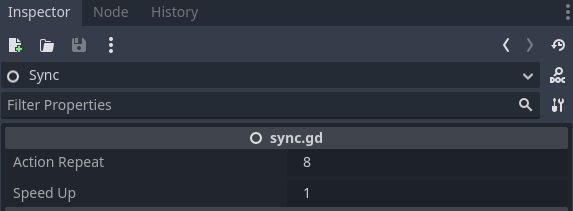
尝试将此属性设置为 8 以加快训练速度。这在更复杂的环境中会带来很大的好处,比如我们将在下一章学习的多人射击游戏。
更多信息0!
这只是 Godot RL Agents 可以实现的一小部分。该库还包括自定义传感器和摄像头,以丰富代理可用的信息。请查看示例以获取更多信息!
作者
本节由 Edward Beeching 撰写